Getting started
Create your account, sign in, and set the few things every estimate depends on: your deposit, your terms, your time zone and your logo. Plan on about twenty minutes.
Sign up
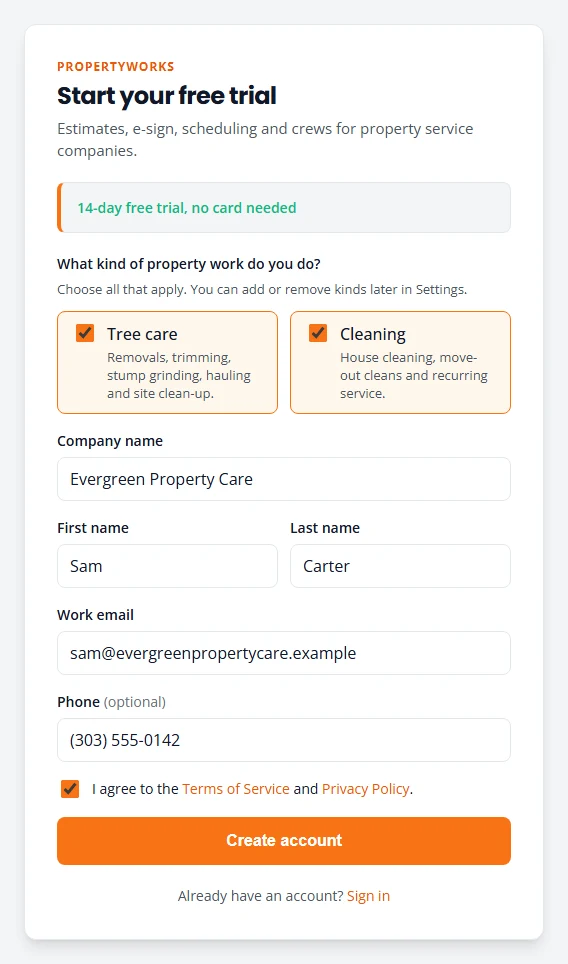
Signing up creates your company and starts a 14-day free trial. You do not need a card to start.
- Open the Northfork Trades sign-up page.
- Under What kind of property work do you do?, tick each kind you do: Tree care, Cleaning, Engine repair, Snow removal, Junk removal & hauling, Yard care & cleanup or Handyman.
- Fill in Company name, your first and last name, and your Work email. Phone is optional.
- Tick the box to agree to the Terms of Service and Privacy Policy, then press Create account.
- You will see Check your email. Open the email from us and press its link.
- Check your email address and press Create my account.
There is no password to choose. You land on Pipeline with a welcome message, and your trial has started.
Sign in each day
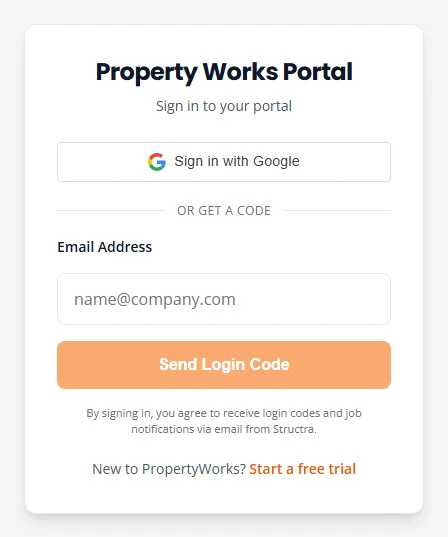
You sign in with a code we email or text you, or with Google. There is no password to remember.
- Go to the Northfork Trades sign-in page. Save it to your phone’s home screen or your bookmarks.
- To get the code by email, type your email under Email Address and press Send Login Code. To get it by text, choose Text message, type your Mobile Number and press Text Me a Code.
- Type the code under 6-Digit Code and press Verify Code.
You land on Pipeline. You can press Sign in with Google instead, as long as the Google account uses the same email as your Northfork Trades account.
Finish setting up
Until your company is set up, admins see a Finish setting up list on Pipeline. It shows how many items are done, such as “2 of 5 done”. Select an item to go to the screen that does it. A done item is ticked.
| Item | Done when |
|---|---|
| Set your time zone | Your time zone is set. See Confirm your setup. |
| Add your logo and letterhead | A logo is uploaded. See Add your name, logo and colors. |
| Review your prices and deposit | You have checked the starter prices and pressed Confirm setup. See Set your prices. |
| Connect Stripe to take payments | Stripe is connected and ready. See Connect Stripe. |
| Add the request form to your website (optional) | You have a website key. You can skip this one. See Website leads. |
| Add a payment method | Your plan has a card on file. During your trial it reminds you to add one. See Subscription. |
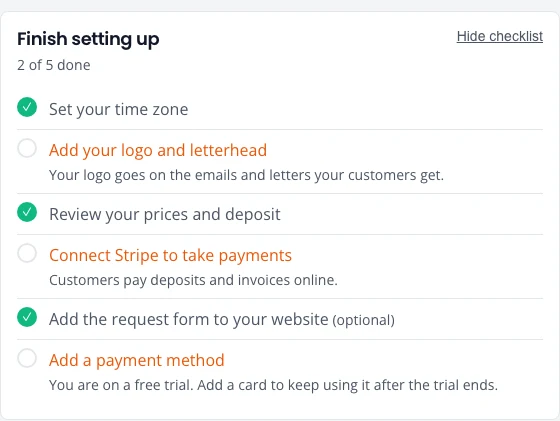
The list goes away by itself once every item that is not optional is done. To put it away sooner, press Hide checklist. That hides it for everyone in your company.
Open your settings
Only admins can change settings. The person who signed up is an admin. You can make others admins under Team.
- Press Settings in the menu, or the gear at the top right.
- Use the tabs across the top: Estimates & payments, Service agreement, Company & branding, Email, Team, Subscription, QuickBooks and Signed-in devices.
What each tab does is in Your settings.
Confirm your setup
The Estimates & payments tab decides what every customer sees on an estimate and after they sign. The first time you open it, it says Confirm your Northfork Trades setup. Go through it once, top to bottom.
- Kinds of work. Check that the kinds you do are On.
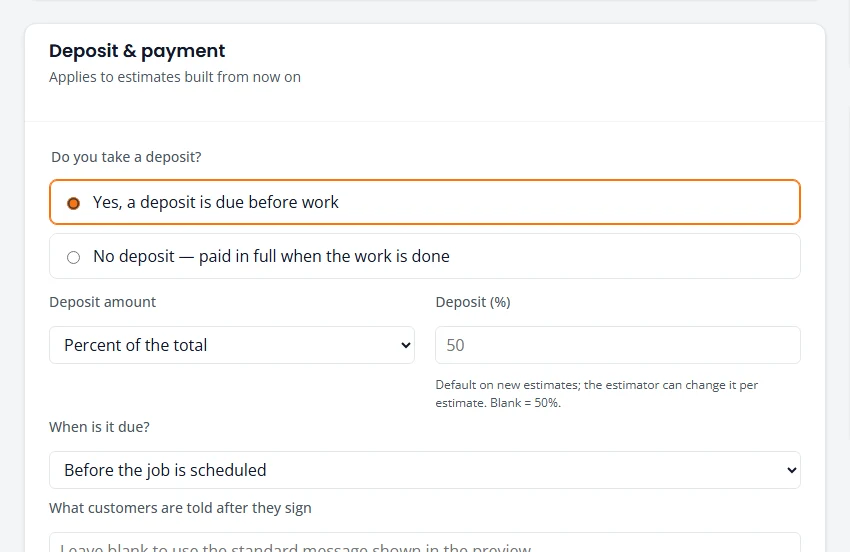
- Deposit & payment. Under Do you take a deposit?, choose Yes, a deposit is due before work or No deposit — paid in full when the work is done. If you take one, set the amount (Percent of the total or Fixed dollar amount) and When is it due?
- What customers are told after they sign. A short next step, such as when you will call to book. Leave it blank to use the standard message.
- Estimates are valid for (days). How long a customer has to accept. Blank means 30 days.
- Job number prefix. The letters at the start of your job numbers. Blank uses the standard prefix for each kind of work, such as TS for tree care.
- Time zone. Pick yours. Every schedule screen shows times in it, whatever time zone your computer or phone is set to. It also sets the times in reminders and what counts as “tomorrow” in your Action Queue.
- Press Save deposit & defaults.
- Estimate terms. Under Start from a template, pick General, Tree service or Cleaning and press Use template. Edit the wording to fit how you work, then press Save terms.
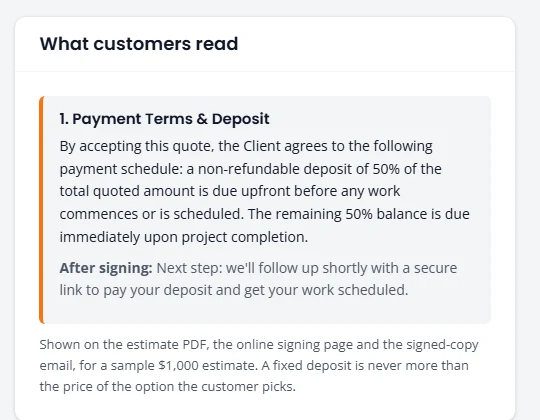
- Read What customers read. It shows your payment terms the way a customer will see them.
- Press Confirm setup at the bottom.
Add your name, logo and colors
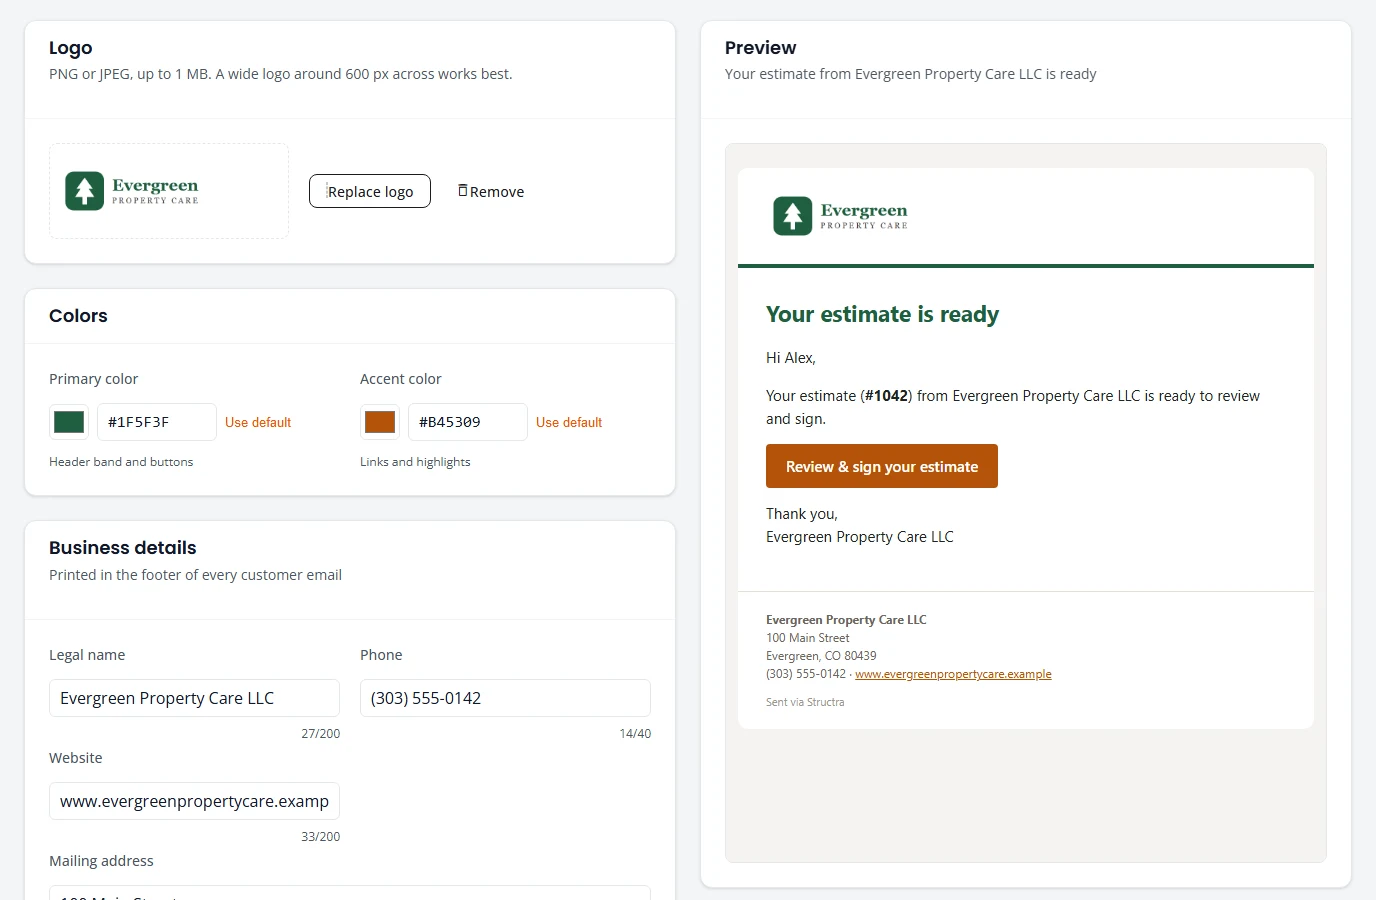
Your business name, logo and colors go on the estimate, the page where customers sign, your invoices and the emails customers get.
- Open the Company & branding tab.
- Check your Business name. If it is not how customers know you, change it and press Save name.
- Press Upload logo. Use a PNG or JPEG up to 1 MB. A wide logo about 600 pixels across works best.
- Set your Primary color (the header band and buttons) and Accent color (links and highlights).
- Fill in Legal name, Phone, Website and Mailing address. These print in the footer of every customer email.
- Check the Preview, then press Save.
Set where replies go
When a customer replies to an estimate email, the reply should reach you.
- Open the Email tab.
- Under Sender, type your email address in Reply-To and press Save.
- Press Send test email. The test goes to your own address, so you can see what customers see.
To start with, your email goes out as “Your Company via Structra”. You can send from your own domain later. See Your settings.
What to do next
- Set your prices. Estimates are built from them.
- Add the people in your office, and add your crew.
- Build your first estimate. Send one to yourself first.
- Choose a plan before your trial ends. See Subscription.
Stuck on something? Email support@structra.tech and tell us what you were trying to do.